

How to Create A Hytale Server on Windows
by letsrespawn

With Hytale popularity already rising and servers popping up left and right, there isn’t full definitive guide on how to actually make a server. Todays post we’re going to be taking a look at how you can make a Hytale Server on your own Windows PC step by step and super easily.
Step #1- Download the official server files
In order to actually host/run the server you need the official server files from Hytale themselves, you can download them here here or head to the official website. Hytale Website
These files will give you every folder and resource you need to actually run the server.
Step #2- Setup Enviroment
Once the zip file is downloaded, extract the .exe file too a folder where you want the server to live. Running this executable will download one more zip file, this .ZIP file is the actual server resource folder compressed, unzip that once it is fully downloaded.


.zip File after .exe file has been ran.

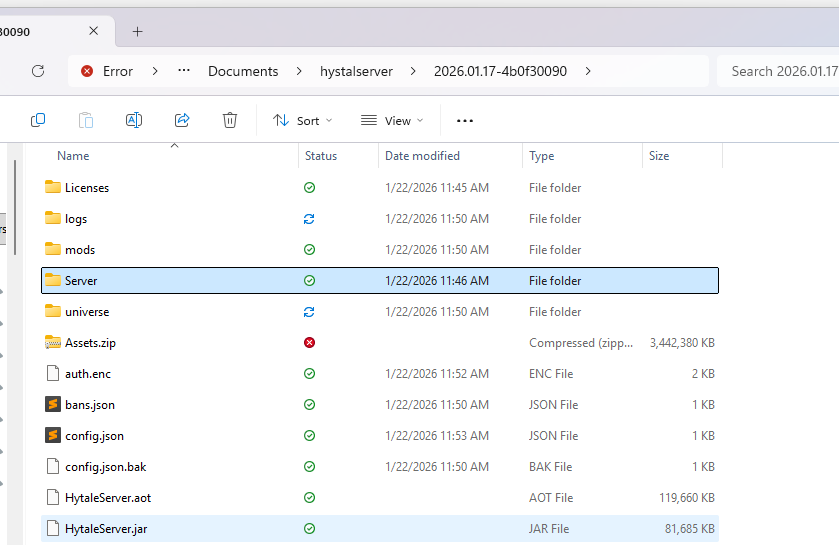
Once you;’ve extracted the zip file, double click on the newly created folder to open that directory. In that folder you will see a Assets.zip file and a Server folder, open the Server folder and move all the contents of that folder into the folder you were just in, this is where you will start your server at.
Step #3- Ensure Java Requirements
In order to start your server you will need Java 25, Hytale themselves recommend downloading the JDK from Adoptium.
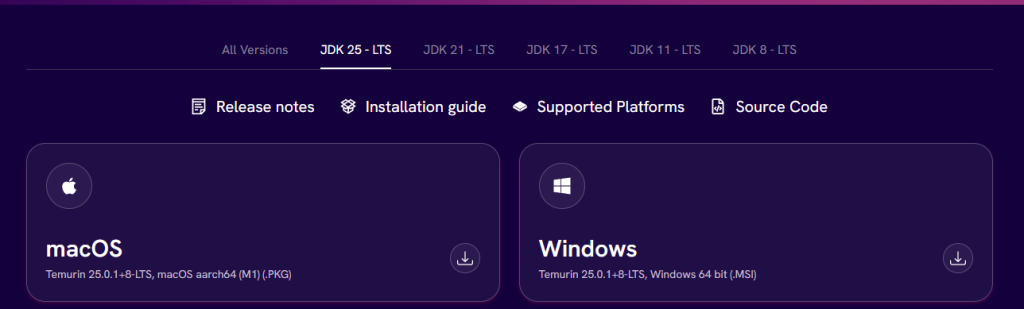
Once you’ve downloaded the .msi file from Adoptium, run the the installer to get the latest version of Java 25, you can verify it’s installed by opening your command prompt and typing in:
java –version

Step #4 – Start your server
In order to start the server, open your command prompt, and make sure you type in the “cd HytaleServer.jar location here”.

Once you’ve done that paste in the following command to your command prompt:
java -XX:AOTCache=HytaleServer.aot -jar HytaleServer.jar –assets Assets.zip
This will finally start your Hytale Server, you will have to authenticate your account one last time, be sure to change your account type to encrypted so you do not have to login every time you restart your server.
In order for players to connect, you will need to give them your IP address, please be careful sharing this with people you do not know and be sure to enable the whitelist features to stop bad actors from joining.
Recommended Articles

by letsrespawn

by letsrespawn

by letsrespawn

by letsrespawn

by letsrespawn

by letsrespawn

by letsrespawn

letsrespawn • Hi, I’m Conner the Founder and Admin of Lets Respawn. I have a passion for Gaming, specifically Block games. I created this website to showcase cool things the community does and keep everyone in the loop 🙂
Latest

by letsrespawn

by letsrespawn

by letsrespawn